Showing posts with label DIY. Show all posts

22.1.12

making a cozy sewing machine cover with song birds

Last week I found this photo over at Geninne's Art Blog (I love her); it's an adorable cozy she made for her sewing machine. I immediately wanted to make my own, inspired by this one!

One of my projects for the winter is to get all my for-fun-not-for-work art and craft supplies out of the ceramics studio, where I really don't use them, and into my new home office, neatly organized, and ready for winter evening craft fun.

A strategy I use to get myself moving on projects is to start with the fun.

It might seem more sensible to start working on my home office by cleaning, decluttering, and painting - yet, if I start there, it's likely that I'll wait a lot longer to start, because I don't actually want to spend a rainy winter weekend cleaning. I'd rather have fun. So what works for me is to start with a fun project like making a sewing machine cozy.  Then I'll likely get really excited about cleaning and decluttering, to make a home for for the new fun sewing machine cozy. Good strategy, right? It's like starting with dessert.

So I spent yesterday evening and this morning making a Gennine-inspired cozy, with my own flowery vintage twist.  I got out my stash of vintage fabrics and found some really cute florals in happy colours, as well as a hand embroidered table runner with sweet blue songbirds. I made a quick-n-dirty paper pattern with scotch tape and printer paper and got busy. Here are the results:
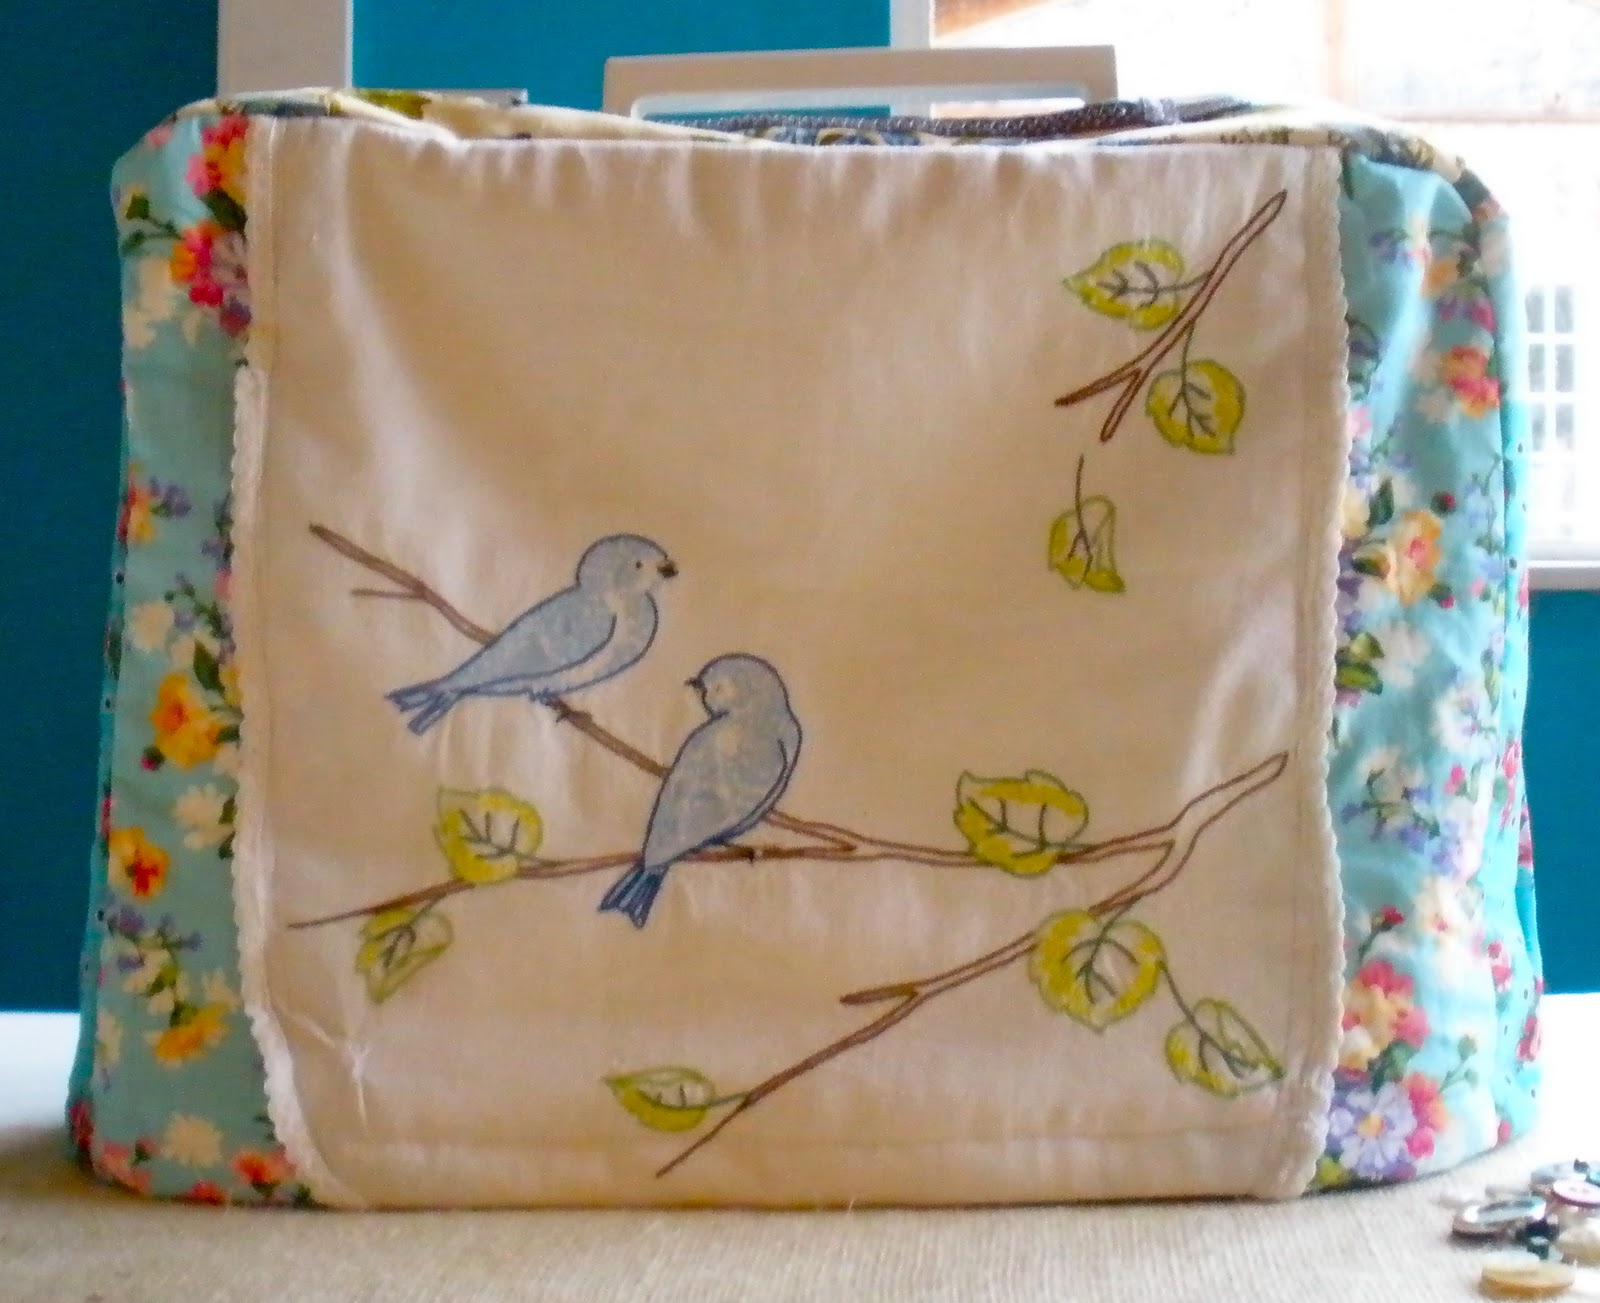
 What do you think? I love it, and I'm so inspired now to do some cleaning and painting to create a worthy home for this new loveliness. Is there a fun project you can do this week to get yourself inspired?

15.12.11

handmade solstice wreath


On Saturday, I participated in a handmade wreath workshop at our little Arts Centre. What fun! The instructors, two island fibre artists, brought in great bags and piles of fresh locally gathered greens of all kinds, and taught us how to adorn a simple willow base with this bounty of nature. I added peacock feathers gathered from my meadow, along with lichen and bay leaves and a big soft satin bow. I love it!

I wanted to share some how-to's on this with you, and because we used very traditional methods and all natural materials, it was hard to find any how-to's on-line! I did find this excellent series on a blog from the UK, so if you live somewhere with an abundance of natural greens, you can try it!

14.12.11

christmastime creativity and an artful tabletop challenge

The past few days have been full of artful creativity and inspiration! It's good to be home. Here is a bit of what I've been up to. I'd love to hear about your holiday craftiness too!


Here's my December Goals collage.  My wish is to take really good care of myself, and be open to feeling true comfort&joy. I want to relax, play, and be OK with lots of imperfection.

I love making these goal collages in my journal/planner. They really help me to move through the year with vision and focus.

washing all the glassware
 Sunday was my sweetie's birthday, a big one with a zero at the end.

I planned a special dinner party.  I don't usually fuss much with table settings; I have a kitchen full of mismatched seconds from my studio, and cute thrift store cutlery. Flowers, candles, good wine, and good food usually make up for my haphazard tables.

But... I really wanted to honour this birthday in a new way.  Also, we were recently blessed with the gift of some beautiful family silverware. I wanted to set a real table.

What to do? Could I translate my mismatched, artful, thrifty ways into a real table setting?

I did some cruising around online for inspiring pictures, and started dreaming of lots of candles, sparkly glass, vintage white and cream, and cute mismatched floral vintage china... I set myself  a challenge: to create the entire table setting - china, centerpiece, candles, runner, and glassware - for $100!

I spent an afternoon cruising the thrift stores in town, and came home with a huge box of pressed glass vessels, and service for 12 in mismatched floral china. It took four thrift stores and lots of scrounging and pondering, but it was fun. I also procured two big bags of course salt, 100 tea lights, a bunch of mini-roses in a gorgeous antique cream shade, a box of cheap restaurant style wine glasses, three metres of burlap, some white paint, and a metre of cream dingleballs. I kept track, and in the end I spent about $110. Yay!

glassware plus course salt and tea-lights lining the centre of the table

washing the thrift-store china

an almost completed place setting.


the completed table! painted distressed white, with burlap runner, cut-glass and tea-light centrepiece, mismatched vintage china, white flowers, and the family silver.
The table was gorgeous. The party was great fun, with wonderful food, friends, and wine animating my well-set table. And the whole project was just such fun...

12.1.10

DIY project: pretty pushpins!

DIY how to make decorative glass push pins pushpins thumbtacks

I'm cleaning my studio really thoroughly this month. Yesterday, when I started to pin images back on to my freshly painted design wall, I was disappointed with how blah my plain clear plastic push pins looked. I've seen the pretty glass magnets that people make from glass drops and images, so I thought I'd try creating some push pins the same way. It was easy, and I'm really happy with how they turned out! You can try it too.

Things you'll need:
  • some pretty magazines
  • scissors
  • white glue, acrylic medium, or any acrylic adhesive that dries clear
  • flat headed metal push pins
  • clear glass drops
  • 5 minute adhesive, the kind that comes in two tubes

DIY how to make decorate glass push pins pushpins thumbtacks1. go through your magazines, and pick some small, pretty images. High contrast, simple, graphic motifs like this one work best.

2. using the glass drop as a template, draw around your images.


DIY how to make decorate glass push pins pushpins thumbtacks3. cut out the images


DIY how to make decorate glass push pins pushpins thumbtacks4. assemble your glue, cut outs, and glass drops.


DIY how to make decorate glass push pins pushpins thumbtacks5. apply a small drop of glue to the back of the glass drop, and spread around, making sure the whole surface is covered. Press the image onto the glue, carefully pressing out all the bubbles.


DIY how to make decorate glass push pins pushpins thumbtacks 6. Set aside and let dry.

7. Mix your 5 minute epoxy according to the package directions. Messy and smelly! Use rubber gloves and open the window! Working quickly, cover the back of the pushpin with a big drop of epoxy, and press on to the back of the glass drop. Don't touch it again! Allow it to set - I left mine over night. Done!


DIY how to make decorate glass push pins pushpins thumbtacksI got excited and glued some other things to my push pins, like sea shells, beach glass, and these ceramic "buddha buttons" that I made in December. My new design wall is going to be so pretty!

Artful Reminders:


Soulful, artful island RETREATS for women - make art, journal, dance, do yoga, practice deep self care, learn to celebrate the sacred in daily life - all with a group of like minded women in our forest retreat at the heart of our Gulf Island... YUM!!!!!! Read more here, and join the mailing list here.


Seven Keys to an Artful Life - I'm so excited about launching this on-line circle for artful living - begins February 15th! Read more here.

LinkWithin

Related Posts Plugin for WordPress, Blogger...